
Wood Stain Visualizer: Try a Stain Color on a Photo of Your Own Wood
Stain is hard to undo, and the color on the can is never the color on your wood. Upload a photo of your fence, floor, pergola or furniture, describe the stain you are considering, and the AI recolors only that wood. Compare two or three tones before you buy samples.
Free account required. Your first design is free when you sign up, then paid plans.
Wood Stain Before and After
Every image below was made by AI with our own image model. The before photos are generated sample scenes, and each after is an edit of its before. Under each pair is the exact instruction we used, what the AI did not do, and what it changed that we did not ask for. We sent these instructions to that model directly, not through this tool, using 4 steps per image. The live tool may use a different model, a different number of steps and different settings (the default is AI Paint Visualizer Grok), so your results will differ.
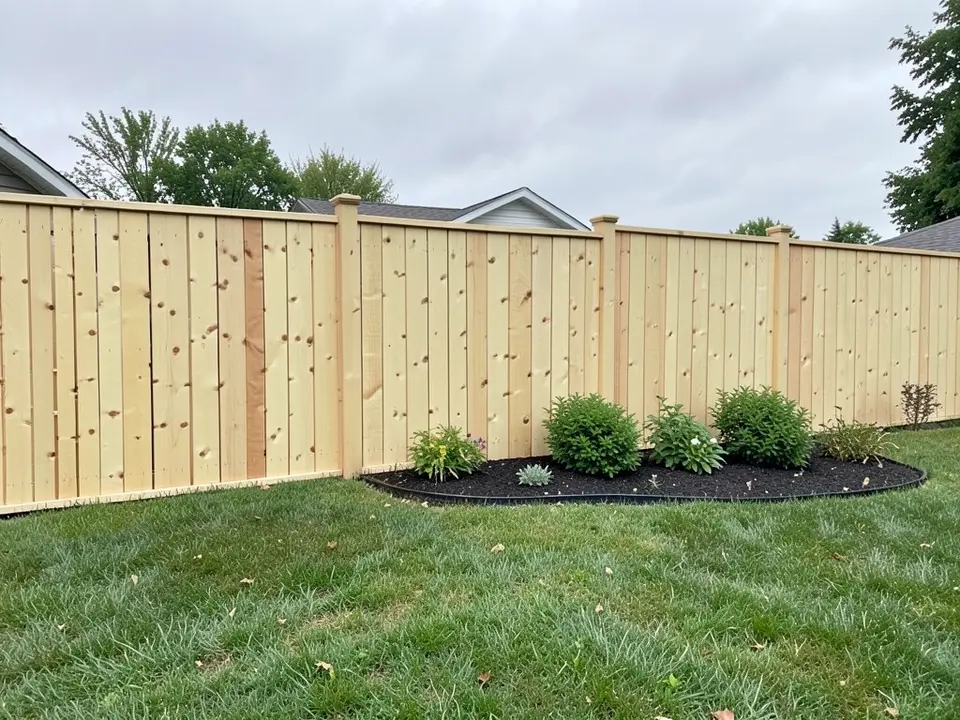 Before
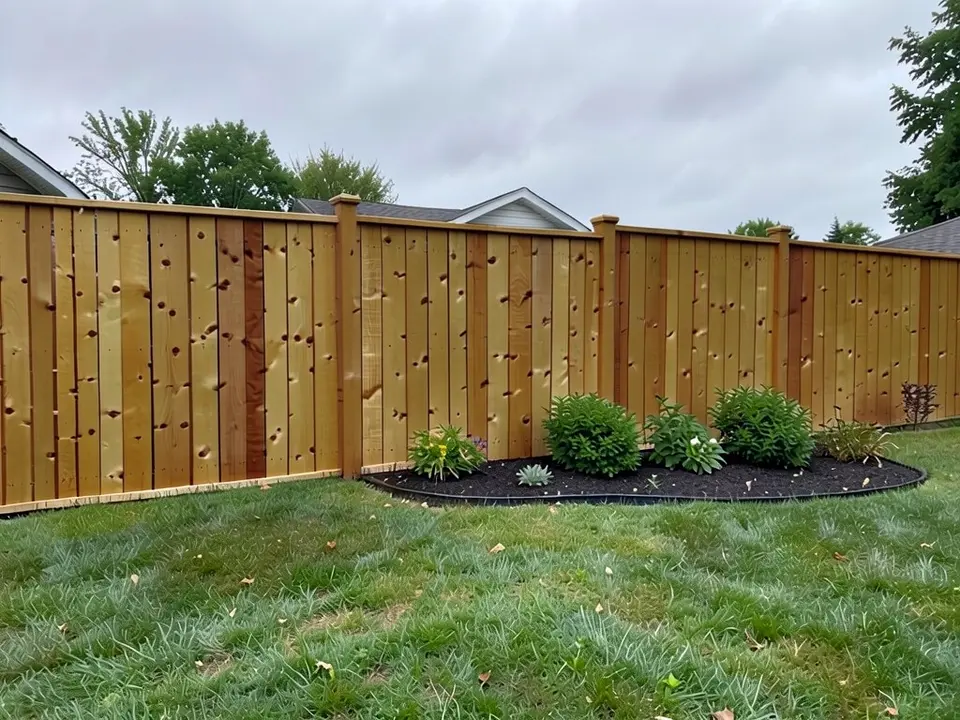 After
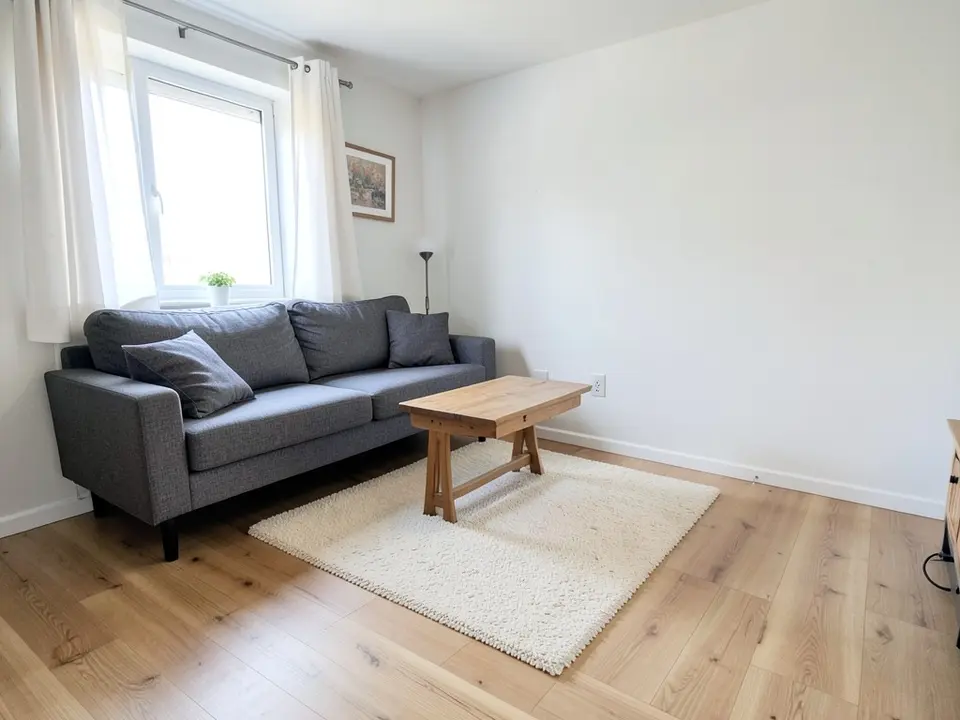 Before
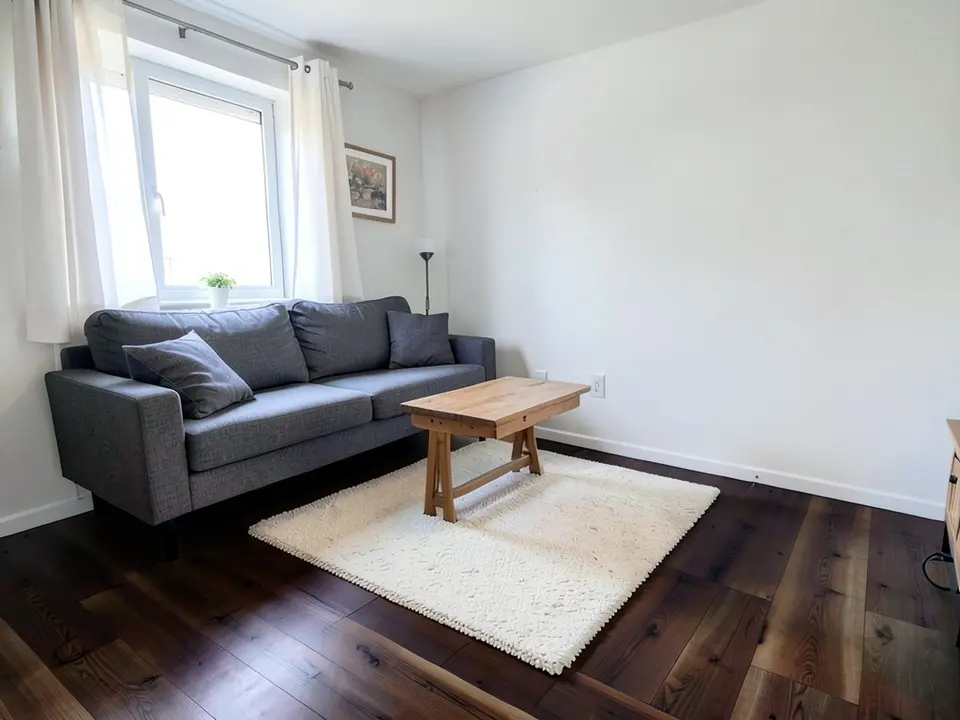 After
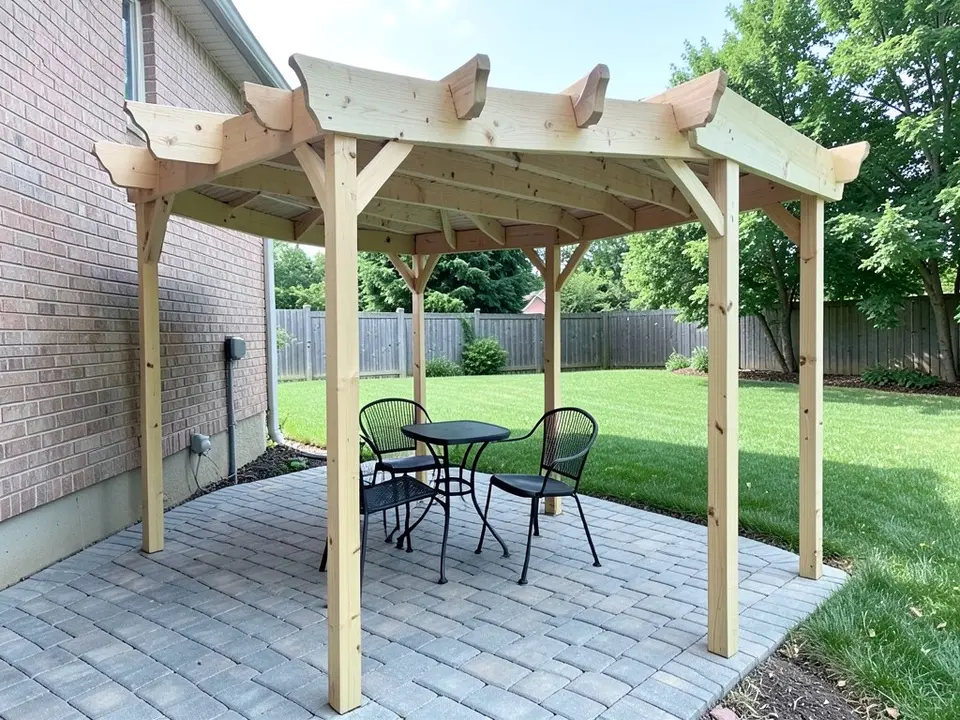 Before
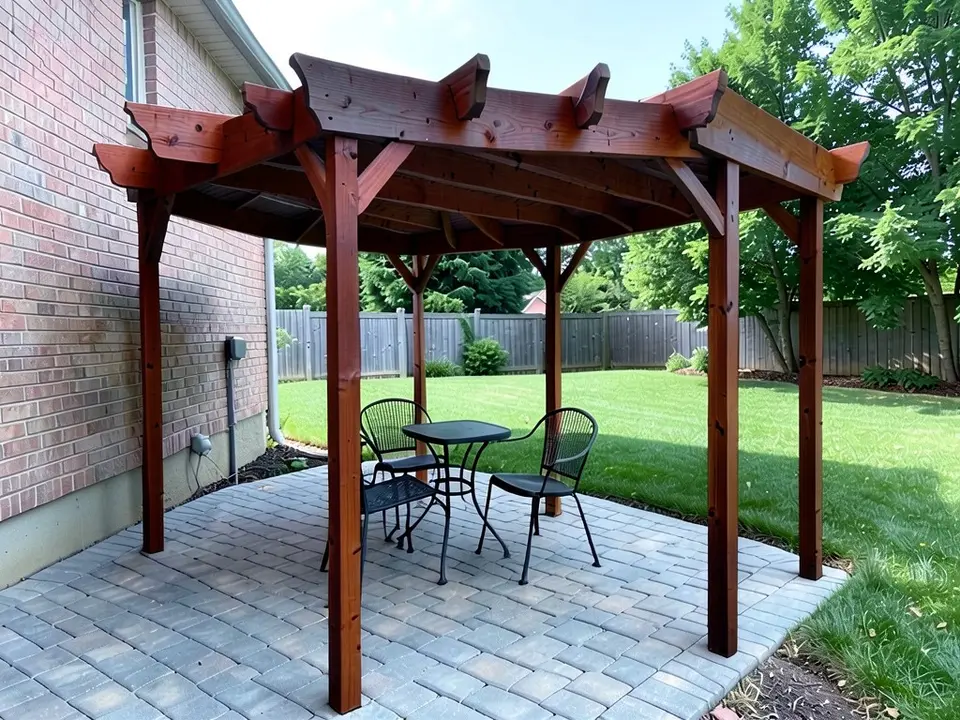 After
What You Can Preview a Stain On
Each card has a starting instruction you can paste into Custom mode and adapt. We have not rendered these exact sentences, so expect to adjust the wording.
Fences and pergolas
New outdoor wood is pale and weathers fast, so the question is usually how dark to go and whether the color should match the house. Preview two or three browns against your siding and roof in the same photo.
Try: "Stain only the wooden fence a medium warm brown with a cool undertone, grain visible. Keep the lawn, the shrubs and the house exactly the same."
See our fence colors page.
Floors
A floor is the biggest wood surface in a room, so a stain color changes how bright and how big it feels. Preview a light, a medium and a dark floor next to your walls and furniture before you sand anything.
Try: "Refinish only the hardwood floor a medium walnut brown with the grain visible. Keep the furniture, the rug and the walls exactly the same."
See our paint colors for dark wood floors page.
Furniture and trim
Dressers, tables, shelves and built-ins are the easiest place to try a stain. Name the one piece, list what must stay the same, and compare a light and a dark version side by side.
Try: "Stain only the wooden dresser a dark walnut brown with the grain visible. Keep the wall, the mirror and the floor exactly the same."
See our stain colors for pine page.
Logs, siding and decks
Large outdoor surfaces have their own pages with the color families people choose most, so start there if your wood is one of these and come back here for the generic steps.
Try: "Stain only the wooden deck boards a warm cedar tone, semi-transparent. Keep the railing, the house and the lawn exactly the same."
See our deck stain color visualizer page.
How to Preview a Wood Stain on Your Photo
Use the paint tool's Custom mode. The Interior Paint mode repaints a whole room with one chosen color, so it cannot leave your furniture and walls alone while it recolors only the wood. In Custom mode, your own sentence is the instruction for the AI edit.
- Take one clear photo of the wood. Shoot fences and pergolas from a few steps back, floors from a corner, and furniture straight on. Daylight shows the real tone of the wood best; a flash can wash it out.
- Open the paint tool and choose Custom. Under "Select Paint Mode", pick "Custom". In the "Custom Paint Requirements" box, say "change only the color of the wooden fence" (or floor, pergola, table), name the stain tone, and list what must stay the same.
- Upload the photo and generate. Add your photo under "Upload Image", keep the default AI model or pick another from the "AI Model" list (each shows its credit cost), then press "Generate Paint Design". You will be asked to sign in first if you have not.
- Check the whole picture. In our examples the AI came out warmer or redder than the words we used. Name a cooler or a warmer base in the instruction, and list anything that must stay the same if something else changed.
From Preview to Real Wood
These points come from Minwax, a stain maker, so read them as a maker's guidance and follow the label on your own product.
- The same stain looks different on different woods. Minwax's blog test compared six stains on five common woods, so a color you loved on oak may not read the same on pine.
- Soft woods can blotch. Minwax says pine and other soft or porous woods tend to absorb stain unevenly, and its pre-stain wood conditioner is meant to help prevent streaking and blotching.
- Test before you commit. Try your top two or three colors on an offcut or a hidden spot of the same wood, with the same prep, and look at it in the light of the room or yard.
An AI preview does none of this. It cannot predict blotching, your wood's age or an old finish, so use it to choose a direction, then test real samples.
More Stain Color Guides
Pick the guide that matches your wood: deck stain color visualizer, log home stain colors, interior log cabin stain colors, cedar siding stain colors and stain colors for pine. Staining concrete instead of wood? See the concrete stain visualizer.
Choosing wall colors to go with new floors? Try paint colors for light wood floors or paint colors for dark wood floors.
Sources
Wood Stain Visualizer FAQ
How do I use a wood stain visualizer on my own photo?+
Take one clear, daylight photo of the wood, open the paint tool, choose Custom mode and write one sentence: which wood to recolor, the stain tone you want, and what must stay the same. Upload the photo and generate. Run two or three colors and compare them side by side before you buy any samples.
Does a wood stain visualizer show how a stain will really look?+
Not exactly. An AI preview shows an even color that follows the grain, but real wood absorbs stain unevenly, and the result depends on the wood, how it was sanded and any old finish. Minwax's own blog test of six stains on five woods shows the same stain looking different on each wood. Use the preview to narrow your list, then test the top colors on a scrap of your own wood.
Can I preview a specific brand's stain color?+
You can name a tone, such as dark walnut or golden honey, but this tool does not hold any brand's real stain formulas, so the result is a tone, not a brand match. Stain makers offer their own visualizers that work with their colors, often on sample photos. Use ours to try a tone on your own wood, then check the maker's chip on a real board.
Why does stain look blotchy on some woods?+
Minwax says soft or porous woods such as pine tend to absorb stain unevenly, so some areas turn darker than the rest, and it recommends a pre-stain wood conditioner to help prevent streaking and blotching. An AI preview cannot show blotching. See our stain colors for pine page for what testers found on pine.
Will the AI stain only the wood and keep the rest of the picture?+
Use Custom mode. The Interior Paint mode takes one color and repaints the whole room, so it cannot recolor only your fence or your floor. In Custom mode you name the wood and list what must stay the same. The AI can still change things you did not ask for, as it did in our examples, so check every area of the result.
Can it preview a floor or a deck, or only furniture?+
Any wood you can photograph: floors, decks, fences, pergolas, doors, beams, paneling and furniture. The preview works best when the wood fills a good part of the photo and is lit evenly. Heavy shadows and strong reflections on a glossy floor make the color harder to read, so take the photo in daylight.
Is this wood stain preview free, and do I need to sign up?+
You need a free account to generate. You can sign in with Google or with a one-time code sent to your email. Your first design is free when you sign up. Paid plans on the pricing page give you more designs.
Try a Stain Color on Your Wood
One photo, one sentence about the wood, and a version to compare before you buy samples.